

Want to challenge yourself on one of North America’s best alpine routes? The Wind River High Route offers an experience you won’t forget.
This trek stretches 80 to 95 miles through Wyoming’s Wind River Range, following the Continental Divide through some of the most beautiful mountain terrain in the United States. You’ll cross high alpine passes, walk beside crystal clear lakes, and push your limits every single day.
This guide covers everything you need to know about the Wind River High Route. You’ll learn about route details, what gear to bring, how to plan your trip, and the necessary skills before you go. This isn’t your typical trail hike, and being prepared makes all the difference.
What is the Wind River High Route?
The Wind River High Route is an alpine route that follows the crest of the Continental Divide through Wyoming’s Wind River Range. Unlike regular hiking trails, this route keeps you off established paths for about 65% of your trip.
The numbers tell an important story. You’ll cover 80 to 95 miles, depending on your exact path. Expect to climb between 20,000 and 30,000 feet total over 5 to 10 days. You’ll cross nine major alpine passes and may need to cross small glaciers depending on the season and your chosen path.
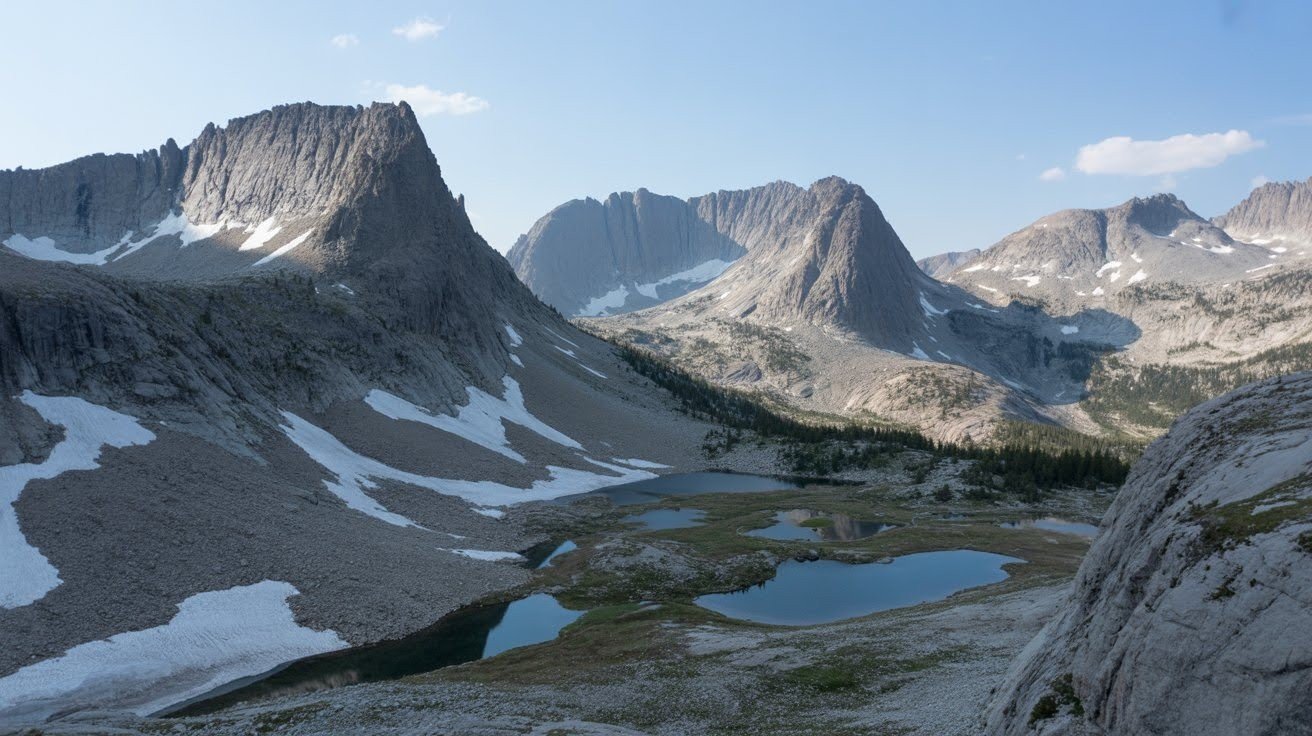
Think of this route as similar to California’s Sierra High Route but with its own character. The terrain includes massive fields of loose rocks called talus, smooth granite slabs, hundreds of alpine lakes, and valleys carved by ancient glaciers. You’ll spend most of your time above 10,000 feet, where the air is thin and weather changes fast.
Route Description and Highlights
The Wind River High Route can be hiked from north to south or south to north, with trailheads at both ends offering different starting experiences.
Start and End Points
The northern end begins at either the Green River Lakes Trailhead or the Glacier Trail. Both give you access to the northern sections of the range. The southern end finishes at Big Sandy Trailhead or Bruce Bridge.
Many hikers prefer going south to north because this direction lets you build up your off-trail skills gradually. The southern sections offer a bit more trail hiking at first, helping you adjust to the route’s demands before hitting the most challenging terrain up north.
Major Sections and Landmarks
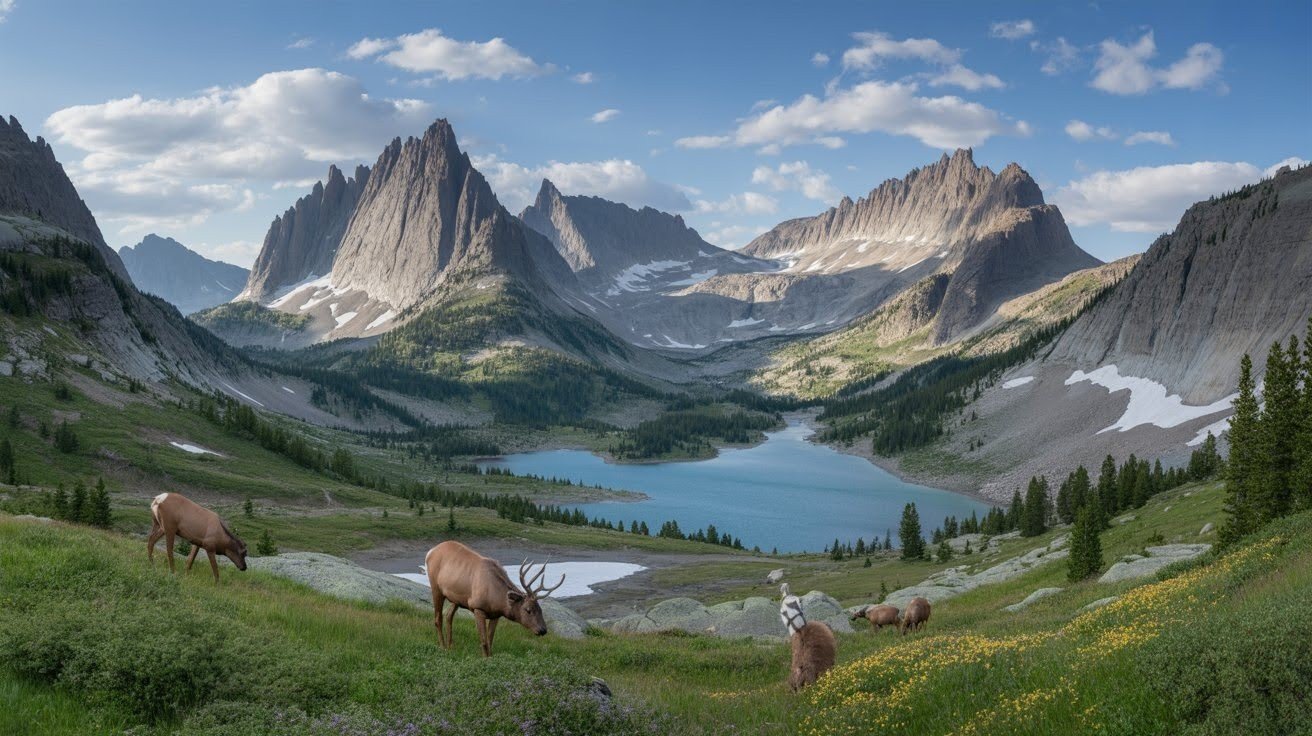
Wind River Peak stands at 13,192 feet and marks the southern bookend of the route’s 13,000-foot peaks. As you move north, you’ll pass through the Cirque of the Towers, a famous spot known worldwide by rock climbers for its dramatic granite walls.
Your path takes you over Texas Pass and Jackass Pass, both demanding crossings that require good route-finding skills. Titcomb Basin and Indian Pass come next, followed by the Knife Point Glacier traverse. The Alpine Lakes Basin presents the most technical section of the entire route. Near the northern end, you might add Gannett Peak to your trip if you want extra challenge. Downs Mountain, rising above 13,000 feet, serves as the northern bookend.
Scenic Highlights
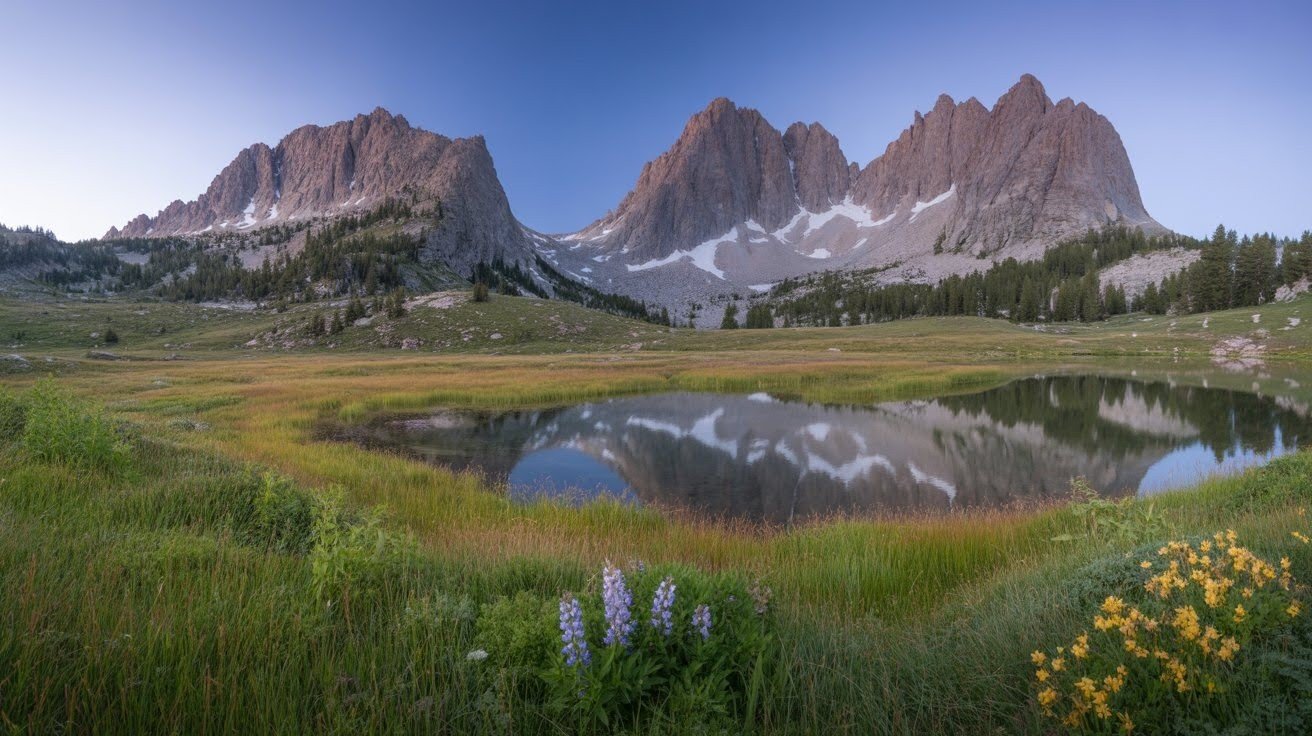
Glaciers feed the lakes along this route, giving the water an amazing turquoise color that seems almost unreal. Permanent snowfields cling to shaded slopes even in late summer, and you might spot small glaciers tucked into high cirques.
Wildlife sightings add to the experience. Elk graze in meadows, bighorn sheep pick their way across cliffs, and grizzly bears live in these mountains, though sightings remain rare. During July and August, wildflower meadows burst with color at lower elevations and in protected basins.
Best Time to Hike
August through mid-September gives you the best window for hiking the Wind River High Route. During these weeks, most snow has melted from the passes, stream crossings run lower, and the weather remains relatively stable.
After dry winters, you might start as early as mid-July and stretch your season through mid-September. However, the early season brings serious challenges. Snow still covers many passes, making navigation harder. Stream crossings run high and cold with meltwater. Mosquitoes swarm in huge numbers, especially near water sources.
Late-season hiking after mid-September risks early winter storms. These storms can dump significant snow and drop temperatures well below freezing. Glaciers also become more exposed as summer snow melts, revealing hard ice that requires crampons. Most experienced hikers recommend planning a three-week window on your calendar. This flexibility lets you pick the best weather window within that time frame, increasing your chances of good conditions.
Required Skills and Fitness Level

This route suits ambitious intermediate to advanced backpackers who want to test their limits. You need solid experience with off-trail route finding, crossing talus fields without twisting an ankle, and Class 3 scrambling over rocks using your hands for balance.
The physical demands are serious. On average, you’ll gain 620 vertical feet for every mile you hike. Your body needs to handle steep climbs while carrying a full backpack at high elevation, where oxygen runs thin.
Navigation skills matter more here than on any marked trail. You must read topographic maps confidently, identify terrain features, and choose safe routes without following cairns or signs. While the route requires no technical rock climbing with ropes, several sections involve Class 3 and Class 4 scrambling. Your body will spend days above 10,000 feet, so altitude tolerance becomes critical for success.
Essential Gear and Preparation

Choosing the right gear can make or break your trip on this demanding route. Every item needs to earn its weight in your pack.
Footwear
Trail running shoes with sticky rubber soles work better than heavy boots for most hikers. Look for approach shoe designs that grip well on rock. The lighter weight reduces fatigue over long days of boulder hopping.
Microspikes or crampons might be necessary depending on when you go and the current snow conditions. An ice axe is rarely needed during the late season, but early-season hikers should carry one for steep snow crossings.
Shelter and Sleep System
Pick a lightweight shelter that can handle variable mountain weather. Afternoon thunderstorms roll in regularly, and temperatures can drop fast when clouds move in.
Your sleeping bag needs to handle sub-freezing nights. Even in August, temperatures at high camps can dip below 32 degrees Fahrenheit. A good sleeping pad also helps you stay warm on cold granite.
Navigation Tools
Detailed topographic maps and a quality guidebook are must-have items. Study your route before you go and mark key waypoints.
A GPS device loaded with the route track provides backup when visibility drops or terrain gets confusing. Also carry a communication device like an inReach or satellite phone. Cell service doesn’t exist in most of the range, so emergency communication requires satellite technology.
Food Storage
An Ursack or other approved bear-resistant food storage works well for this route. While bear encounters happen rarely, grizzlies do live in these mountains, and proper food storage keeps both you and bears safe.
At established camps, rodents pose a bigger daily problem than bears. Marmots and ground squirrels will chew through packs and bags to reach food. Hang food bags or use hard containers at popular camping spots.
Clothing Layers
Early-season hikers need good insect protection, including head nets and treated clothing. Mosquitoes can be intense near water sources in July.
Rain gear and storm protection are required year-round. Afternoon thunderstorms develop quickly in the mountains. Carry warm layers, including a puffy jacket and an arm hat for high elevation camps and early morning starts.
Wind River High Route Hiking Tips
Success on the Wind River High Route comes from smart planning and steady execution. These tips come from experienced hikers who have completed the route.
- Allow extra days in your schedule for weather delays. Storms can pin you down, and some passes become dangerous in lightning or whiteout conditions.
- Cross streams and rivers in the early morning when water levels run lowest. Afternoon melt raises water levels significantly.
- Scout difficult passes before you commit to crossing them. Sometimes a quick look ahead shows you a better path or warns you of problems.
- Keep a steady pace on talus fields rather than rushing. Consistent movement prevents fatigue and reduces twisted ankle risk.
- Carry backup exit plans in case weather, injury, or other problems force you off the route. Know where trails lead back to roads.
- Follow Leave No Trace principles strictly. Camp on durable surfaces like rock, gravel, or snow rather than fragile alpine plants.
Pack out all trash and human waste from sensitive areas. The high country takes decades to recover from damage.
Conclusion
The Wind River High Route stands as one of the world’s best alpine treks. This route takes you through spectacular mountain terrain that few people ever see.
Success requires thorough preparation and honest assessment of your skills. The off-trail terrain, high elevation, and remote location demand experience and fitness beyond typical backpacking trips. Start training months in advance and practice the skills you’ll need.
For backpackers with the right experience and preparation, this route delivers an incredibly rewarding experience. The challenges you face make the views, the solitude, and the sense of accomplishment even more meaningful. Start planning your trip now, build your skills, and train your body for the demands ahead.
Frequently Asked Questions
Can I bring my dog on the Wind River High Route?
Dogs are not recommended for this route. The extensive talus fields require constant boulder hopping that’s hard on dog paws. Many sections involve scrambling over rocks where dogs cannot safely travel.
How does the difficulty compare to the John Muir Trail?
The Wind River High Route is significantly harder than the John Muir Trail. You’ll spend much more time off-trail, stay at higher elevations longer, and face more technical terrain with steep scrambling sections throughout.
What’s the best way to train for this route?
Build your endurance with hikes that include serious elevation gain. Practice navigating off-trail in mountain terrain. Strengthen your ankles and legs with specific exercises since you’ll spend days hopping across unstable rocks.
Are there water sources along the entire route?
Water sources are generally abundant along the Wind River High Route. Alpine lakes and streams provide reliable water in most sections. A few stretches require carrying extra water, but long dry sections are rare in this range.
What should I do if I encounter a grizzly bear?
Always carry bear spray and keep it accessible on your hip belt. Make noise when hiking through thick vegetation or areas with limited visibility. Store food properly every night. If you see a bear, back away slowly while facing it and avoid direct eye contact.